Dark Chocolate Chip Scones


In our household, we are BIG dark chocolate lovers. Even the littles love it. So for one of our #boydsatbreakfast mornings, I made my famous Dark Chocolate Chip Scones! You can use whatever chocolate chips you want, but in my opinion, the dark chocolate chips make them divine! 

 I first started to make these scones back in 2012 in my college days, before I was married, and would eat them as I studied-probably why I gained 5 extra pounds that semester! At least it got me to study right?? I loved this recipe because after you make the scones, you can stick them in the freezer and pull them out whenever you feel like one-in my case, too often! haha 

I was going to just post a picture of the scones and let you dream about them, but thought I'd share the secret location to these delicious scones! It hasn't been pinned very much-and I think it needs to! This goodness is too good to keep secret. I found this recipe back in the very early days of Pinterest. The original recipe is from this cute blog

Scones always gave off a vibe as one of those "hard" or "tricky" recipes to follow but I was wrong! This recipe is super easy. All I use is a bowl and a wooden spoon. The key is not to over mix! Over mixing will ruin these beauties. Just like Nikki states,  "Careful handling of the dough ensures a lighter and more airy scone." AKA flaky and buttery! yum. And to make the shape, I just do the drop method-just like cookies. I like to make mine a pretty good size, so I drop them about the size of an ice cream scoop.
Get a glass of milk ready because these quick and delicious scones will be ones your family will beg for!


Dark Chocolate Chip Scones

Preheat oven to 375

Makes approx. 20 scones

Ingredients:

  • 3 1/4 cups flour
  • 1/4 cup sugar
  • 1/4 cup brown sugar
  • 1 Tablespoon + 1 teaspoon baking powder
  • 1/4 teaspoon salt
  • 3 Tablespoons cold butter, diced
  • 2 cups chocolate chips *I like dark choc. chips
  • 2 cups heavy whipping cream

Directions:
  1. Line cookie sheet with parchment paper or silicone liner.
  2. Using a wooden spoon, stir together the flour, sugars, baking powder and salt in a large mixing bowl. Cut the butter into the flour mixture, using a pastry cutter or fork, until the mixture resembles coarse crumbs.
  3. Stir in the chocolate chips. Add the whipping cream to the flour mixture and stir just until the ingredients are moistened. Do not over mix! Drop the dough by large tablespoons onto prepared baking sheets, about 2 inches apart. Bake for 20 minutes. Let cool on wire rack.

To freeze: Place completely cooled scones into labeled freezer bag. When ready to enjoy, microwave one scone on a paper towel for 20 to 30 seconds.
I have loved making them for my little family and hope you will too!

Smells like Christmas

Today, my house smelled like Christmas. It was glorious. In this summer AZ heat, I needed a way to "cool" our house down and this did the trick! This cookie is my all time favorite cookie in the whole world. I love the combo flavors of white chocolate chips and cranberries-it makes me really happy-and with oatmeal and cinnamon in the mix? Well, that just makes it acceptable for breakfast right??

I searched high and low for a yummy recipe and found it here and adapted it a little. I like it way better than a traditional oatmeal raisin cookie. This cookie will not disappoint I promise you.


Oatmeal Cranberry White Chocolate Chip Cookie

Bake in oven at 350

Makes 20 cookies

Ingredients:
  • 1/2 cup (1 stick) unsalted butter, softened
  • 1/3 cup sugar
  • 1/3 cup light brown sugar
  • 1 large egg
  • 1 tsp. vanilla
  • 1 cup all-purpose flour
  • 1 cup rolled oats
  • 1/2 tsp. baking soda
  • 1/2 tsp. cinnamon
  • 1/2 tsp. salt
  • 1 cup white chocolate chip
  • 3/4 cup dried cranberries

Directions:
  1. In a large mixing bowl, beat butter, sugar, and brown sugar on medium speed. 
  2. Add the egg and vanilla until well combined.
  3. In a medium mixing bowl, whisk flour, oats, baking soda, cinnamon, and salt. Add to the large mixing bowl and mix until just combined.
  4. Stir in white chocolate chips and cranberries. Refrigerate dough for 1-2 hours.
  5. Take the dough out of fridge and preheat oven to 350 degrees.
  6. Scoop a heaping tablespoon of dough and roll into balls and place on parchment-lined baking sheets.
  7. Bake 12-14 mins. Cool on baking sheet for 5 mins then transfer to wire racks to cool.
Enjoy!

Looking for more of my food diary posts? Go to Instagram and look up #jessiesfooddiary


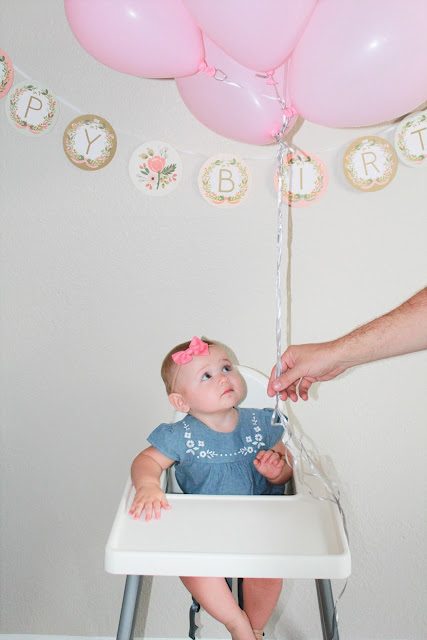
Nora is ONE!

Our sweet Nora turned 1 about a month ago and I am finally getting around to getting a blog post about it! She is a funny little girl. So different from our boy. It was so interesting to see what different personalities they had right from the start! From day one Nora has shown us she is spunky, needy, sensitive, independent, sweet, and emotional, all the things girls are suppose to be right?! ;) 

She doesn't walk yet, but is very determined! She loves to eat pretty much anything you give her including blueberries (her favorite), strawberries, kiwi, oatmeal, cottage cheese, pancakes, shredded chicken, and the list can go on! She loves to dance-she'll find the beat in just about every song she hears! She loves to follow her brother around and get chased across the room. She is becoming a very ticklish little girl and we love to hear her little chuckles. She gives so much love to her family and all her stuffed animals and we just love her so much!

On the morning of her birthday, we filled her crib with balloons!


Of course her balloon obsessed brother had to join!


Her birthday was filled with lots of cuddles and  family time together.
We moved into our new house the day after her birthday so the week after, we threw an ice cream party at our new house with all our family. So fun to have close family celebrate our little princess!

My amazing sister-in-law and brother-in-law have a videography business and they were so sweet to surprise us with a super cute video capturing moments from the party! So special-I love it!


Cake made by yours truly! I've never made a cake like this before so I was a little nervous! I'm so happy with how it turned out!


My sweet and dear friend She's My Tuesday made all the fabulous decorations! I told her I wanted the party to based off the Rifle Paper Co. floral banner I bought and she went above and beyond.


Of course big brother had to join in on the fun!


We love you very much Nora Mei!!

Food: A Love Language


What's your love language? Have you and your sweetheart ever discussed each other's love language? 

As a couple, I think it is very healthy to talk and discuss about these things. When Josh and I were engaged, we knew we loved each other very very much. But we also knew we needed to discover and understand how to speak our future spouse's language. One of the keys to not only a happy marriage, but a loving one, is learning how to meet your spouse's need for love. Isn't that a great quote I just made up haha? I believe it 100%.  As we were courting, it became real clear real fast  what each other's love language was through small acts of love. But it became even more clear on how to meet our spouse's need for love when we got married. 

The 5 love languages are:

  1. Words of Affirmation
  2. Acts of Service
  3. Receiving Gifts
  4. Quality Time
  5. Physical Touch

My love language is definitely Acts of Service and Josh learned that quickly. He is continually serving me in more ways than just the usual "doing the dishes" or "taking our the garbage". He cuts up my fruit. Haha does that sound silly? I hate cutting up fruit (especially big ones like watermelon or pineapple) or peeling potatoes or anything of that nature. 
On a more serious note, he shows me love by loving my children. Every day when daddy gets home, we eat dinner and then he gives the kids a bath. Every night. That shows an immense amount of love to me that he cares the kids are clean and happy and that he put it upon himself to take on that night time duty. He serves me by relieving some of the household chores and kid duties. Right after the bath, he spends "daddy and me" time with the kids. They love him so much. As you can see, my other love language is Quality Time.

One of Josh's love language is Receiving Gifts or in other words, receiving food! And good thing because that's how I show my love to my family-I LOVE to cook and bake! He feels so much love and appreciation when I take my time and preparation to cook for him. He also loves it when he has enough to take to work the next day. 

Today I am sharing one of his all time favorite treats, Banana Bread! He does so much for me and our family, I thought today I would show him my love by baking him some banana bread. He's going to love it! *The chocolate chips are an option, but really, it's never an option for us.


Banana Bread

Preheat oven to 350 and grease + flour 9 x 5 pan

Ingredients:

In medium bowl-
  • 4 very ripe bananas, mashed well
  • 1/4 cup Greek yogurt
  • 1/2 cup unsalted butter, melted + cooled
  • 2 large eggs, beaten lightly
  • 1 tsp. vanilla
  • 1 tsp. cinnamon

Large mixing bowl-

  • 2 cups of flour
  • 3/4 cup of sugar
  • 3/4 tsp. baking soda
  • 1/4 tsp. baking powder
  • 1/2 tsp. salt
  • *optional cup of walnuts or chocolate chips


Directions:
  1. In a medium bowl, stir in the mashed bananas, yogurt, melted butter, eggs, vanilla, and cinnamon. Mix until all incorporated.
  2. In a large mixing bowl, whisk flour, sugar, baking soda, baking powder, and salt.
  3. Lightly fold in the banana mixture into the dry ingredients with a rubber spatula until just combined. The batter should look thick and chunky. 
  4. Fold in the walnuts or chocolate chips.
  5. Pour into the prepared 9 x 5 baking pan and bake for 55-70 mins.
  6. Cool for 5 mins.


Enjoy!

Looking for more of my food diary posts? Go to Instagram and look up #jessiesfooddiary

*Please don't steal my recipes :) Always link or credit my recipes if you use it, thanks!


A Dream Come True

A couple weeks ago on Instagram, we revealed that we painted our kitchen cabinets! Quiet a few people messaged and texted me asking how we did it and what we used so I thought I'd do a blog post about it! As a cook and homemaker, it was very important for me to have a fresh and clean kitchen! It has always been a dream of mine to have white cabinets and feel so blessed we were able to make that happen!


We painted our kitchen cabinets the week before we moved in and so happy with it! It definitely took a lot of TIME and PATIENCE but well worth it. Well, worth my money! We bought the Rust-Oleum Cabinet Transformations Kit from Home Depot. As a disclaimer, we are NOT experienced painters and it was still simple enough for us to do! For our size kitchen, we bought 2 kits and we used about 1 1/2 for our kitchen and saved the other half for our bathrooms.The kit is super simple to follow. I took us about 5 days, only because we had to have babysitters and drive over to the new house every day for only a few hours that we had.

Anyways, WAY cheaper than hiring somebody to paint it for your-it just depends if you want to put in the work! It comes with a "deglosser" that you scrub on your cabinets and then wipe off. It acts as a "sander" so you don't have to be sanding till your arms fall off. The "deglosser" also cleans off all the gunk on your cabinets. After that, you just start painting! Be very patient with this part. Allow the cabinets doors to completely dry before you're ready to do another coat. After all the coats are done, you put on the protective coat (kind of like that clear nail polish coat you put on after you paint your nails), and you're done! *DON'T use the optional decorative glaze that comes with the kit. I think it makes your cabinets like an "antique" brown look-unless that's the look you're going for.

We also got rid of the old, scratched up, brass hardware and added new hardware and hinges and it made these cabinets look super brand new and professional quality! These handles were WAY cheaper than buying it at Home Depot! At Home Depot or Lowes, they were about $5 each handle. That would have costed us like $125 for just the handles! Eek! We bought enough for our kitchen and bathrooms for about $43. You can find the handles here and the hinges here

Before


During


We had to rip off old adhesive shelf liners that looked like they've been there for like 100 years. We relined them with clean white liners.


He's such a goof. Always trying to find the fun in things. One of the many reasons why I love him.


The kit said 2 coats but don't let that fool you! This is what 1 coat looked like. We did like 4 coats.

After!


When we were house hunting, one of the things that were on my "must list" was to have a window above the sink and when we saw this huge window with a plant shelf. I fell in love. How fun would it be to have Spring time flowers here at my window??


A little look into our unfinished dinning area! Scored this beautiful World Market table WITH a bench for $150 and all four chairs for only $150 so we bought our whole dinning set for $300 when it would have easily been about $600+ for the table alone! Gotta love those Facebook consignment sites!


Doesn't it look great?? Our next projects will be to update the sink, have matching appliances, and new floors! In all due time. I love waking up to my "new" kitchen every morning! We recommend the kit to anyone!